
Send SMS with OpenText Notifications
In this article, we’ll learn how to send SMS with OpenText Notifications.
OpenText™ Notifications brings email, SMS, push, voice and fax messaging channels together into a single, cloud-based messaging platform, eliminating siloed communication services. Whether sending one or millions of messages, Notifications makes it easy to deliver personalized communications to customers’ channel of choice to strengthen relationships, expand visibility and fuel sales.
Use case
A new product has been launched, so we want to inform our clients, through SMS, about a special promotion for the early birds. For this, I will use a recipient list and also use variables for personalization.
Client list
Our client list is a CSV file that looks like this:
REF,ADDR,INS_1,INS_2,INS_3,INS_4
Summer campaign 2023,699-999-999,Joaquin,Garzon,joaquin@joaquinonsft.com,MyApp
Login
Browse to your Notifications server and introduce your credentials (user name/password)
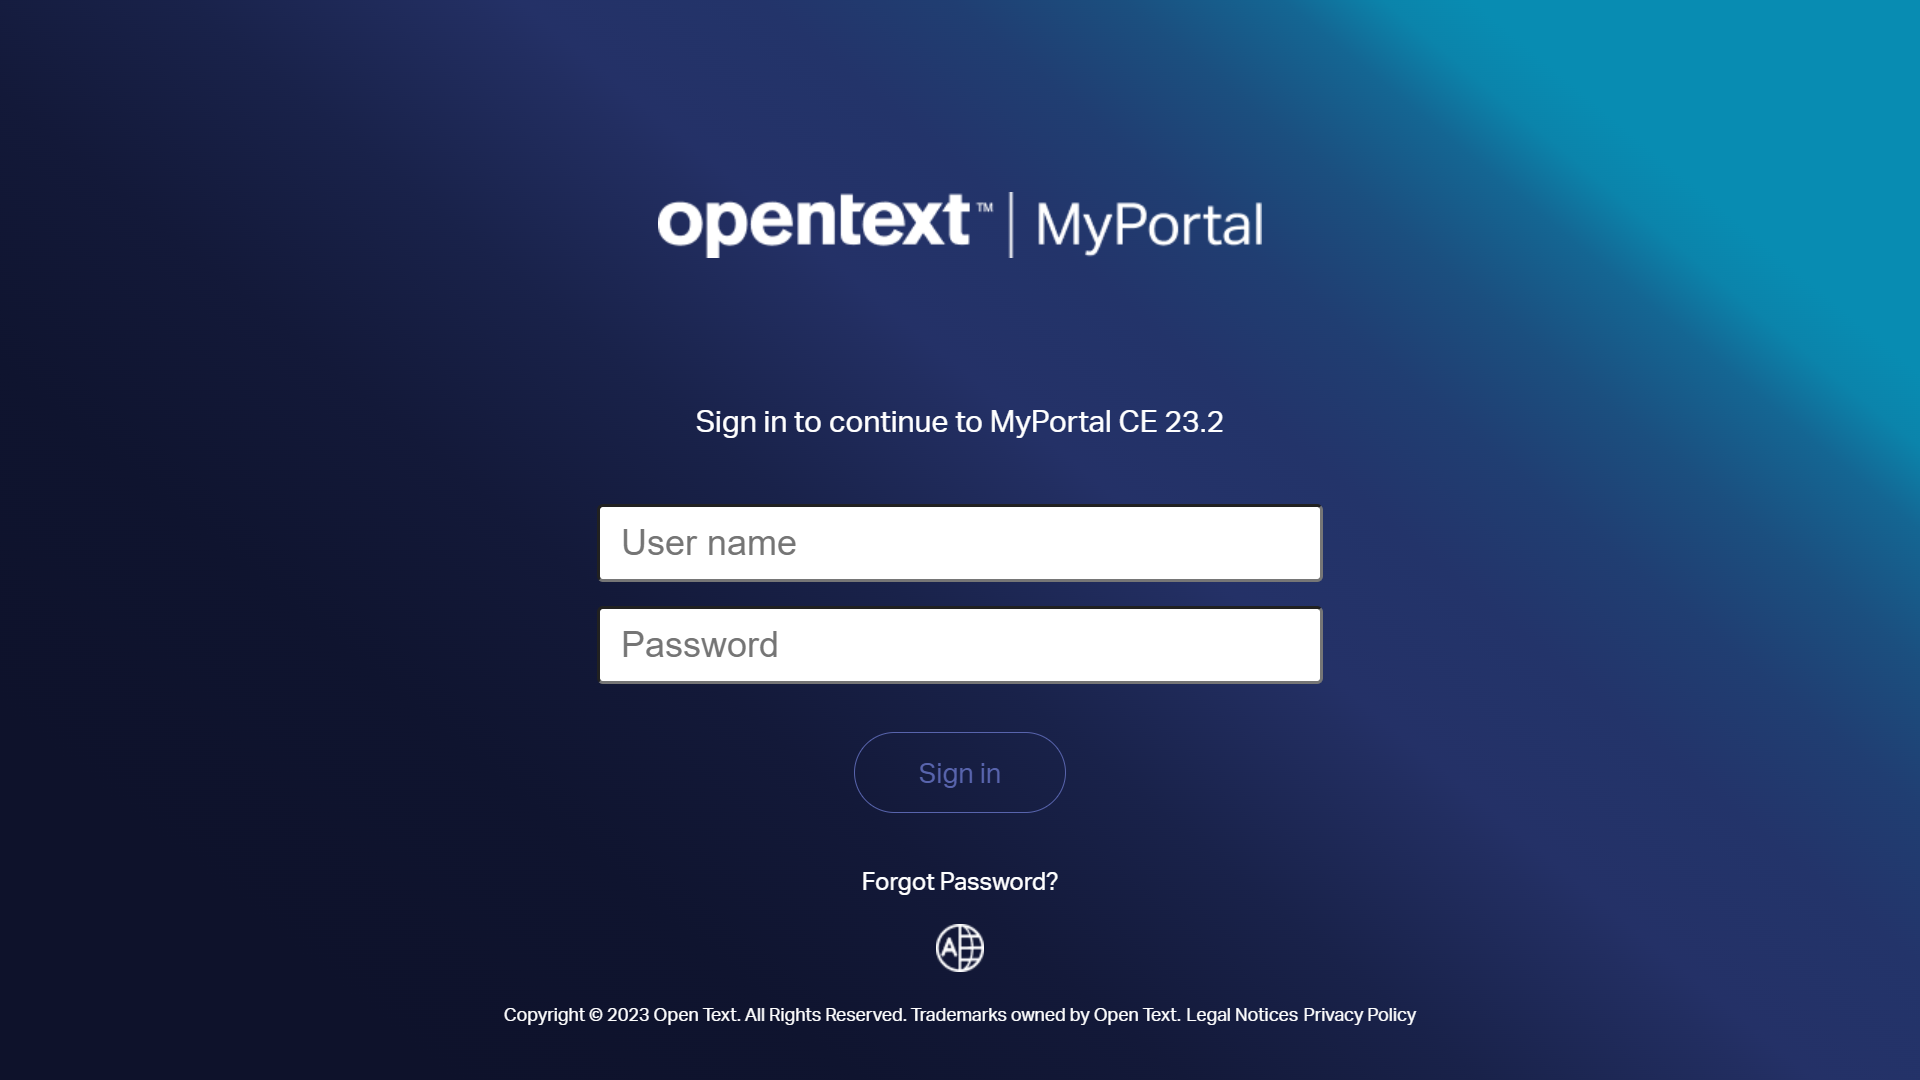
Click on the Sign in button to log in.
User interface desired language
You can change the language used in the user interface doing click on the world icon at the bottom of the login page.
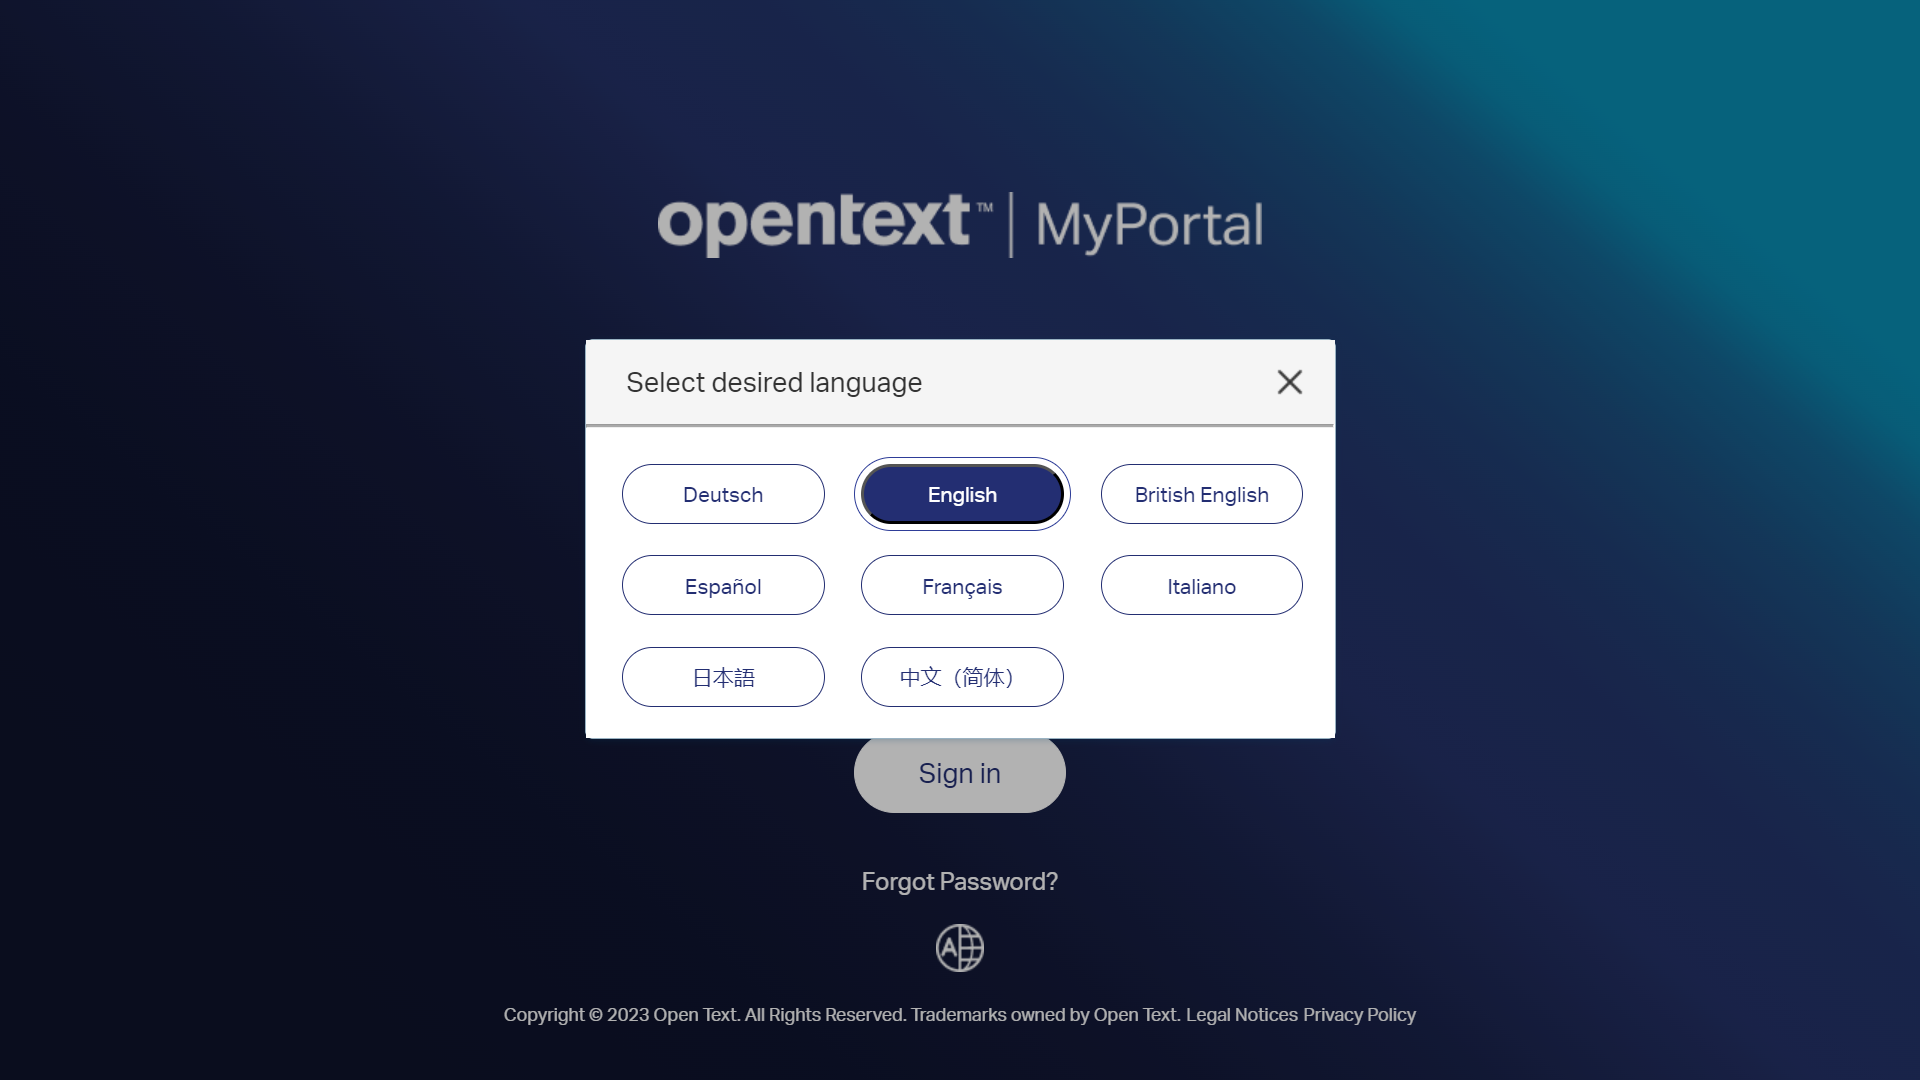
At the moment of writing this article, there are 8 languages supported by default.
Upload a client list
Let’s create a new client list from our CSV file.
Click on Lists > Manage list > Upload list (icon)
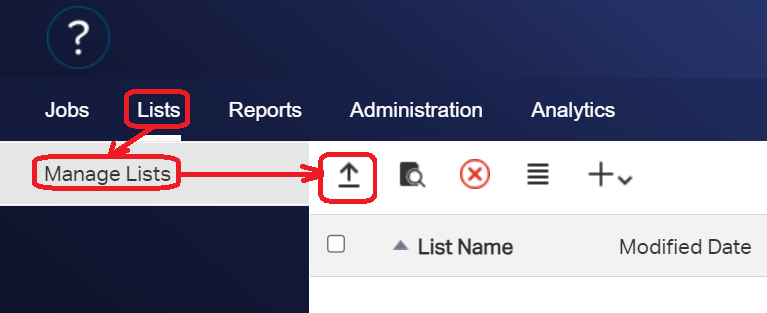
The Upload list pop-up is shown. Just provide the required information:
- List name: UpdateApp.SMS
- Level: Customer
- List type: Sms List
- Character set: Unicode (UTF-8)
- Choose file: customer-update_app_sms.csv
Click on Upload button to create the list.
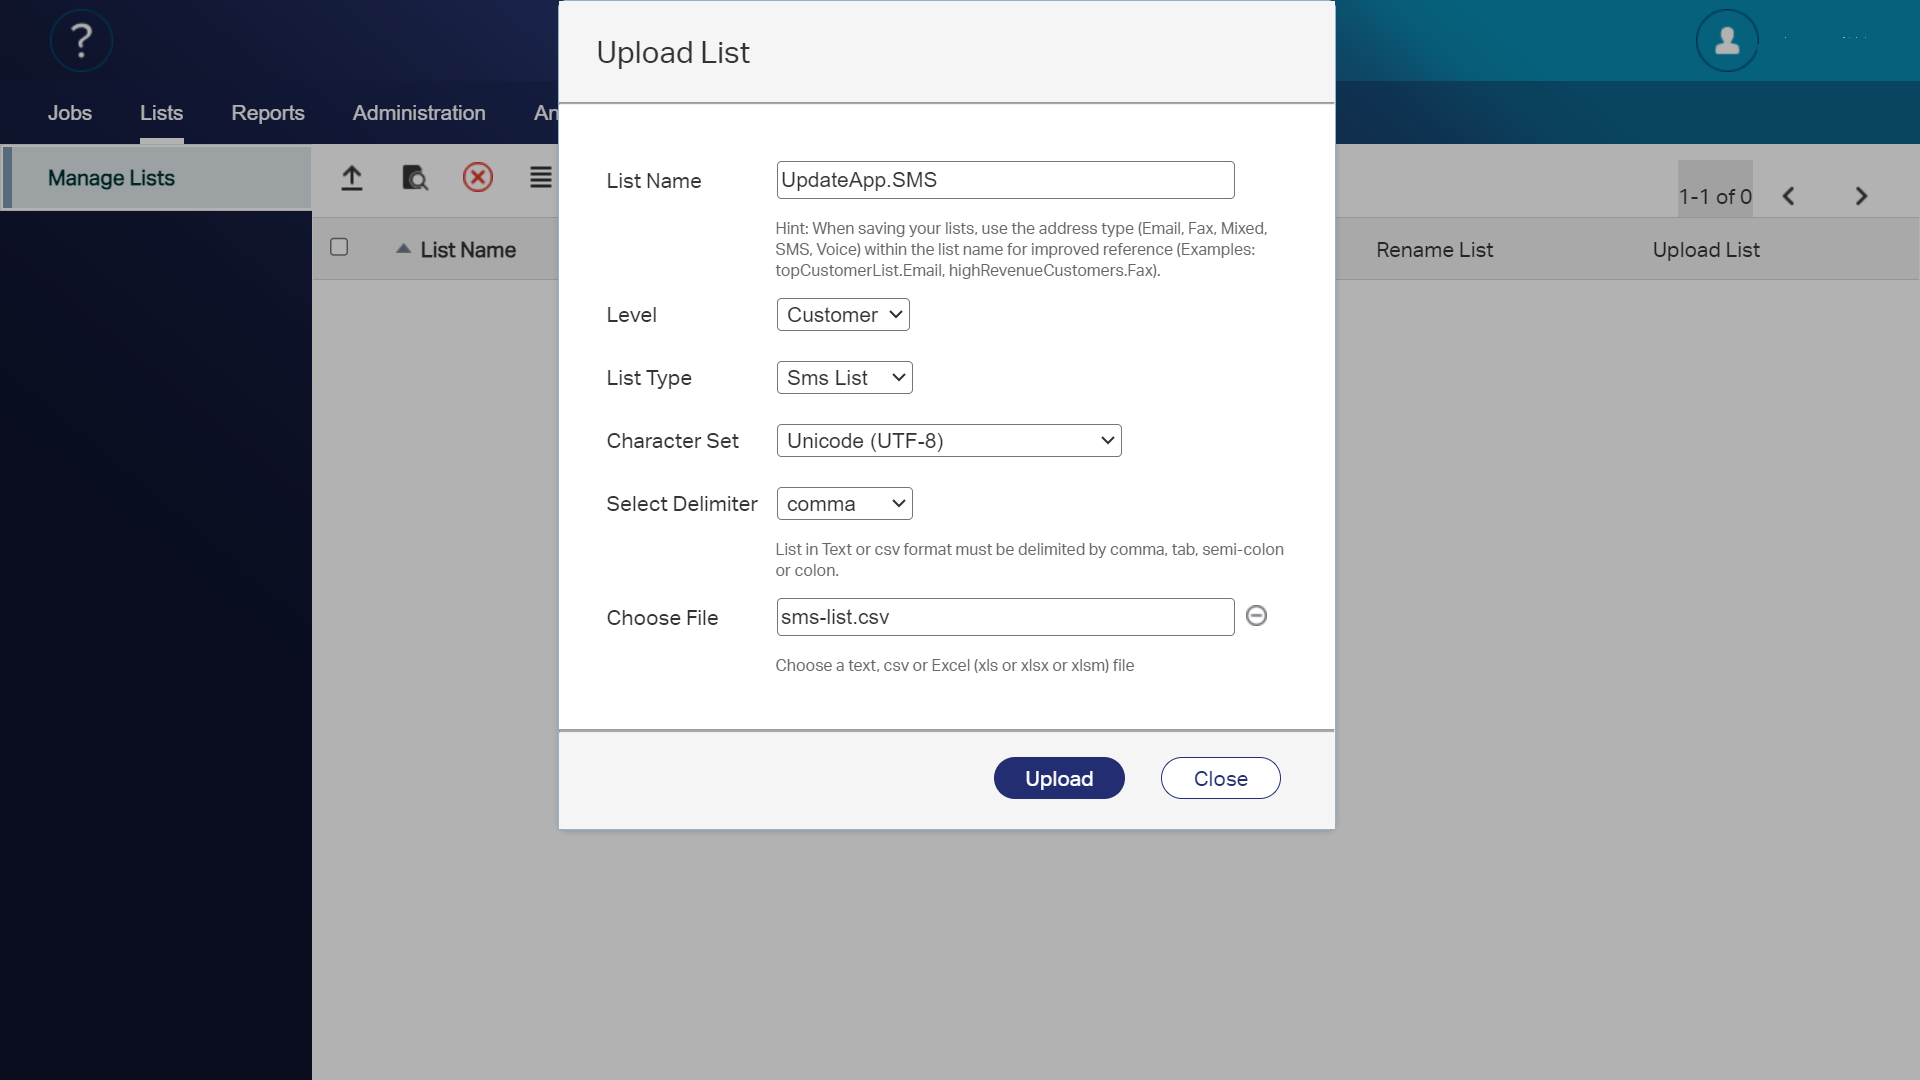
When the import is finished, a pop-up window will appear with a summary of the number of imported records. You can close it by clicking the Close window button.
Create a message
Next, we are going to create a message. Just follow these steps:
- Click on
Jobs > Create/Send job > SMS - Click on
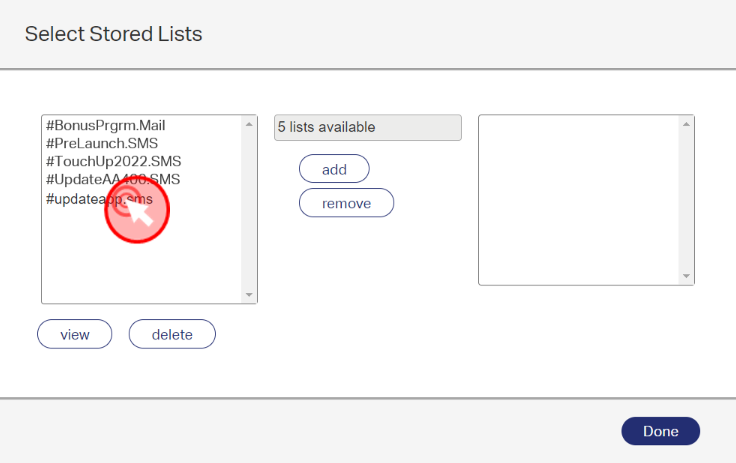
Select stored listicon
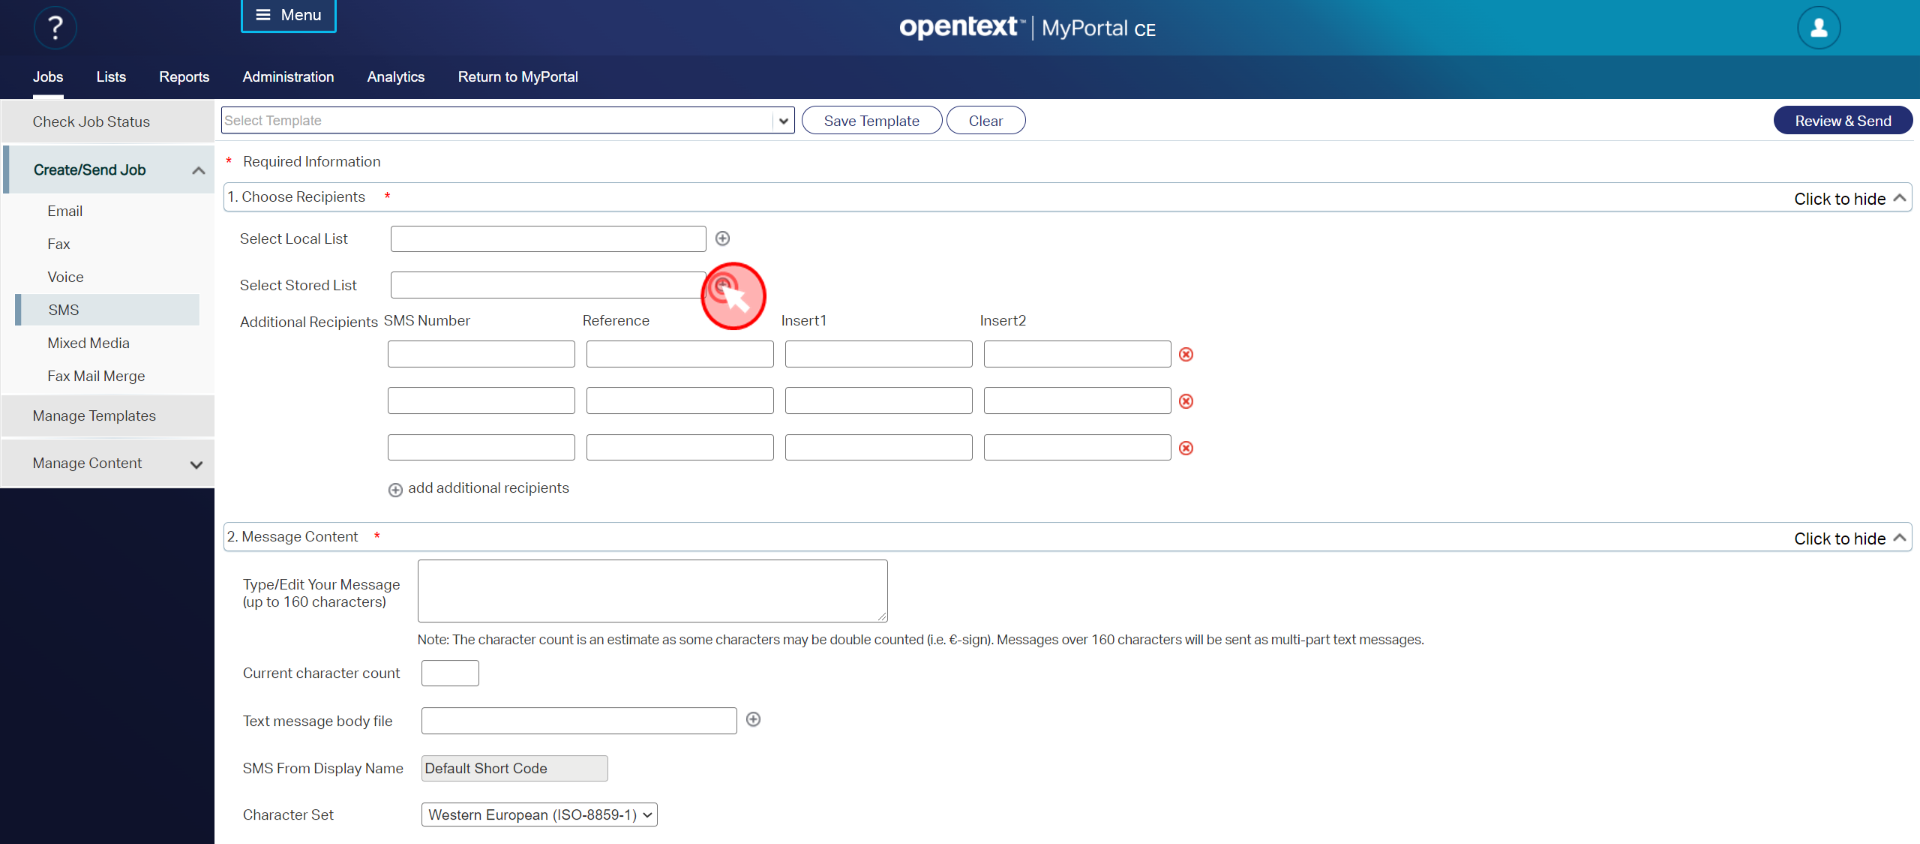
In the Select stored list pop-up:
- Select the list created previously (#updateapp.sms)
- Click on
Addbutton - Click on
Donebutton
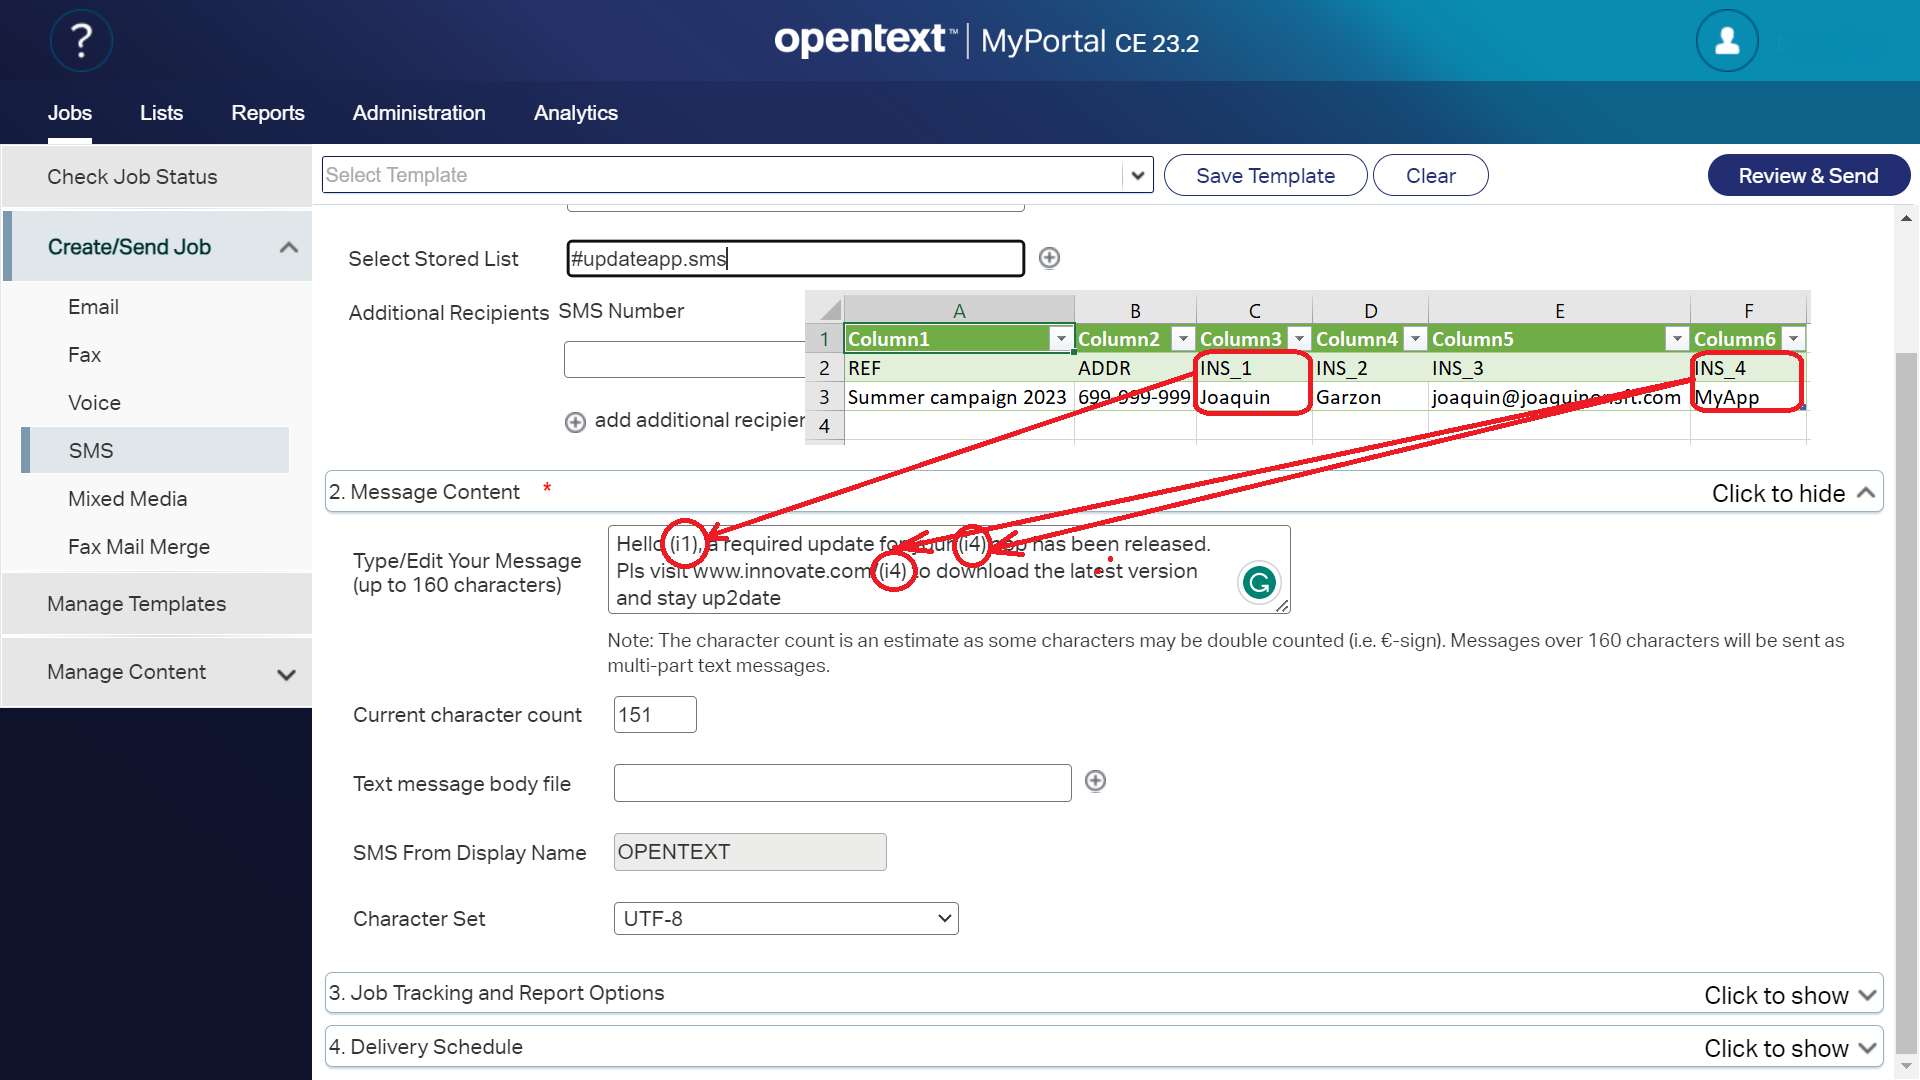
- Introduce the text for your message in the text box
Type/edit your message, i.e.
 Hello, a required update for your app has been released.
 Pls visit www.innovate.com/ to download the latest version
 and stay up2date

Now, let’s customize our communication adding some variables.
 Hello (i1), a required update for your (i4) app has been released.
 Pls visit www.innovate.com/(i4) to download the latest version
 and stay up2date
Where (i1) makes references to column INS_1 (client name) and (i4) refers to column (INS_4) (app name) in our CSV file.
NOTE: Instead of writing a text by myself, I could also select a file that already contains a meaningful text, using the
Text message body fileoption. This can ensure that the text is created in accordance with company policies and of course it saves time when dealing with more complex texts with variables and business logic.
Finally I add the campaign name and the billing code. That makes it easier to find the related report after the SMS has been sent out and create an invoice based on these. Just follow these steps:
- Click on
Job tracking and Report Options - Provide a
Campaign name (Cust Ref), i.e. Summer campaign 2023 - Provide a
Billing code, i.e. 20230814
![]()
- Click on
Save Templatebutton at the top of the page
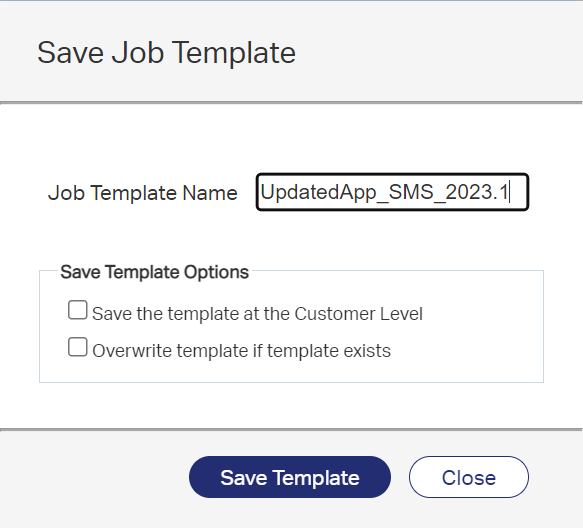
- Provide a
Job Template Name, i.e. UpdatedApp_SMS_2023.1 - Click on
Save Template
The template has been saved, next time we don’t have to enter the billing code or other details manually nor do I have to select the correct list of recipients.
TIP: To load a Job Template previously saved, just:
- Browse to
Jobs > Create/Send Job > SMS- Select a template from the
Select Templatedrop-down listAnd everything is back again after selecting the template
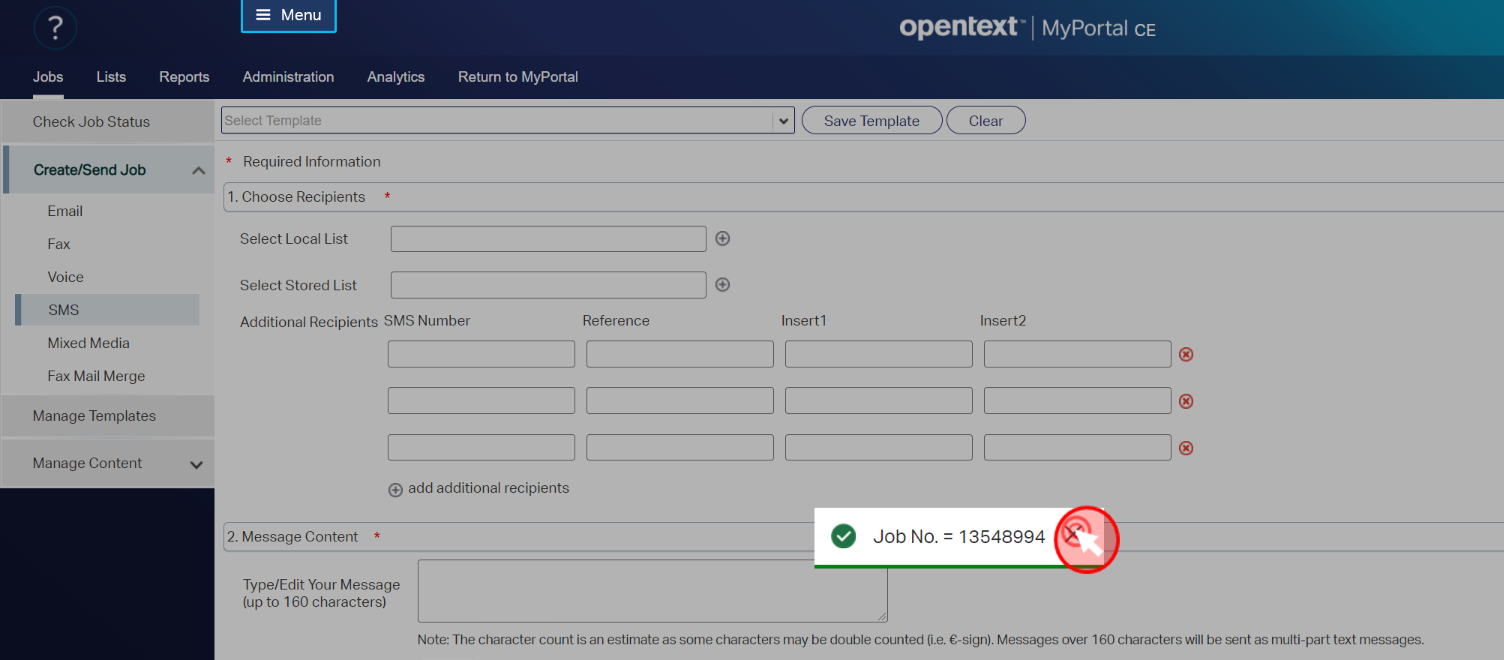
Click on Submit button on the top right-hand side.
The Job Number under which I’ll find the job report in the next step is shown in a pop-up.
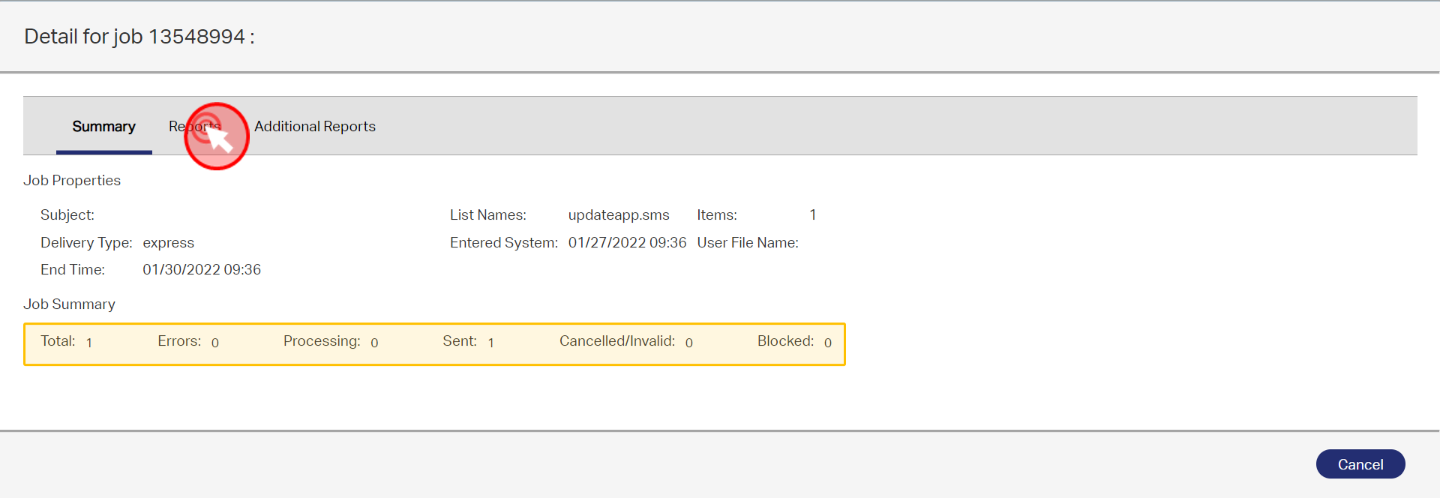
Check job status
To check the job status click on Jobs > Check Job Status.
Until the job expires, the job number will show up in this section.
Click on the job number.

The Details for job X pop-up is shown.
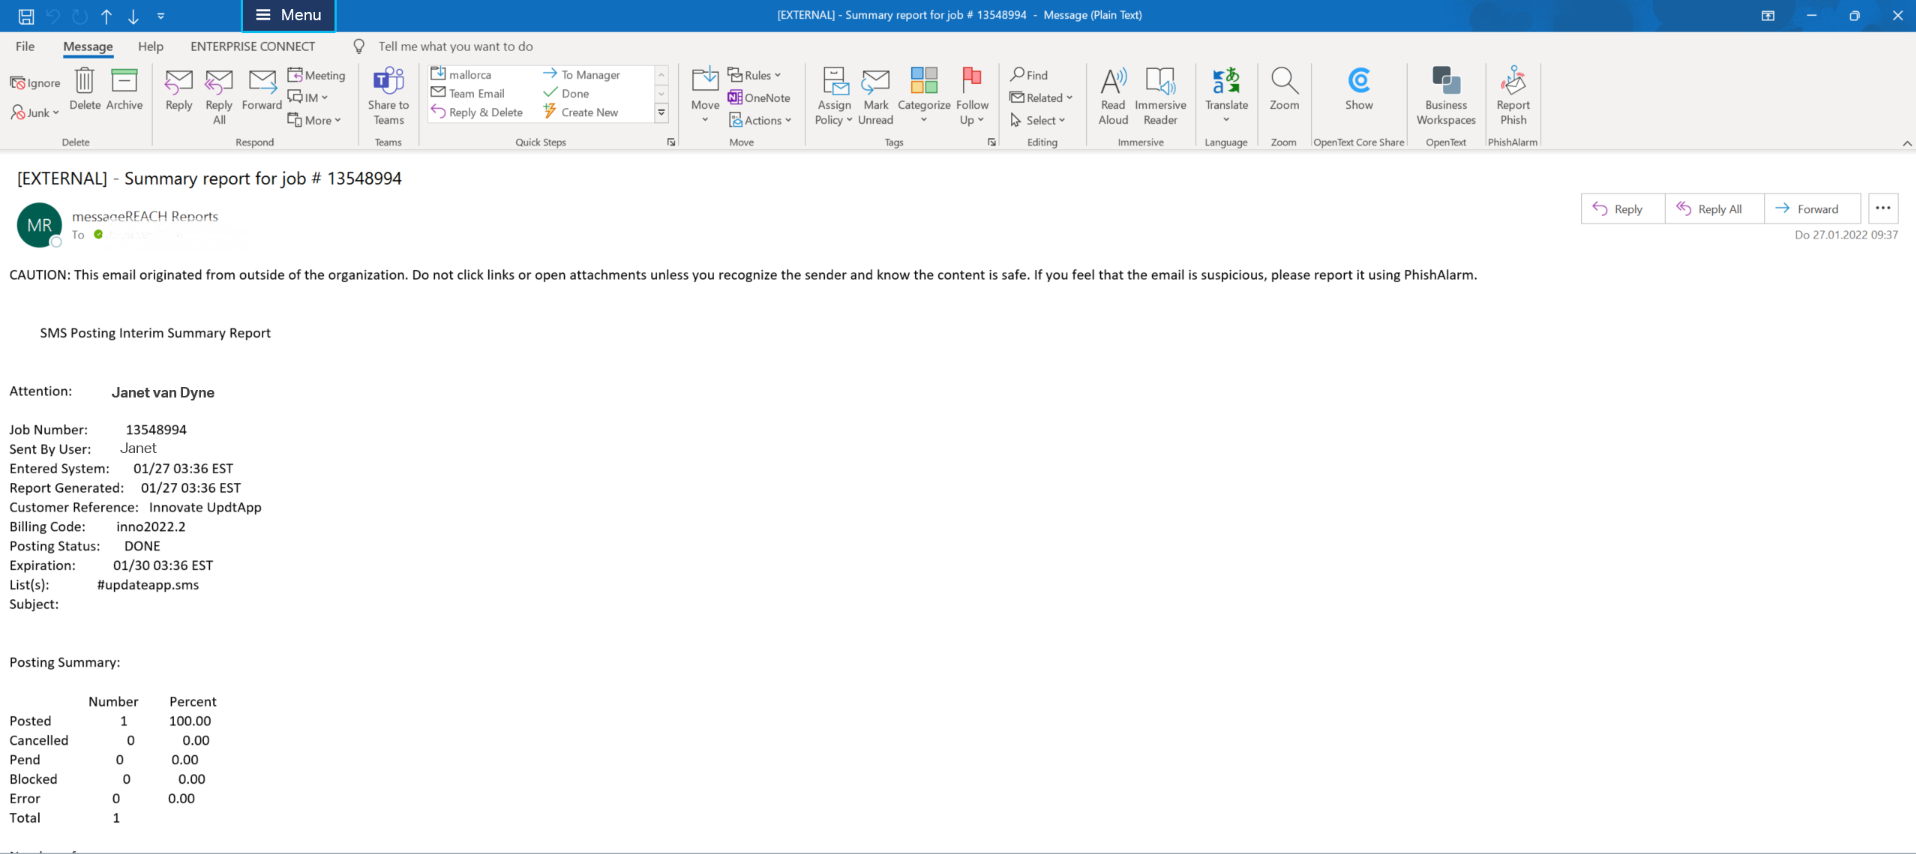
In the bottom line, we can see that our message was processed and sent and that there was no error
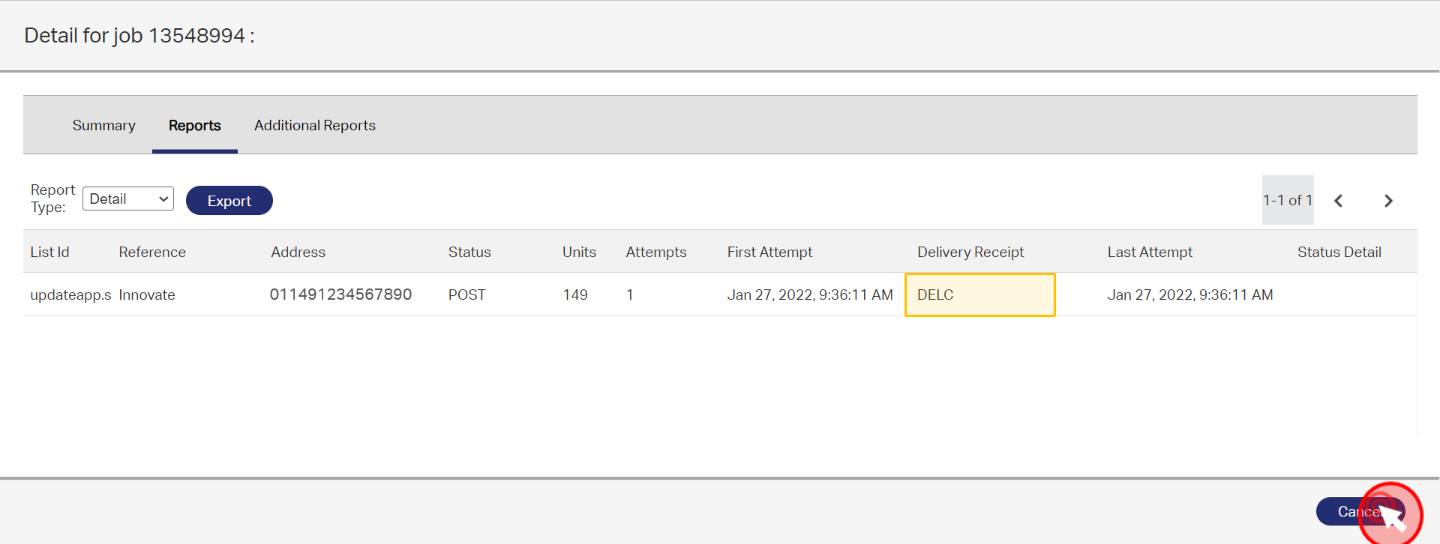
Click on Reports tab. You’ll see additional information. The most relevant info usually is the Delivery Receipt that shows us that the delivery is confirmed (DELC = DELivery Confirmed).
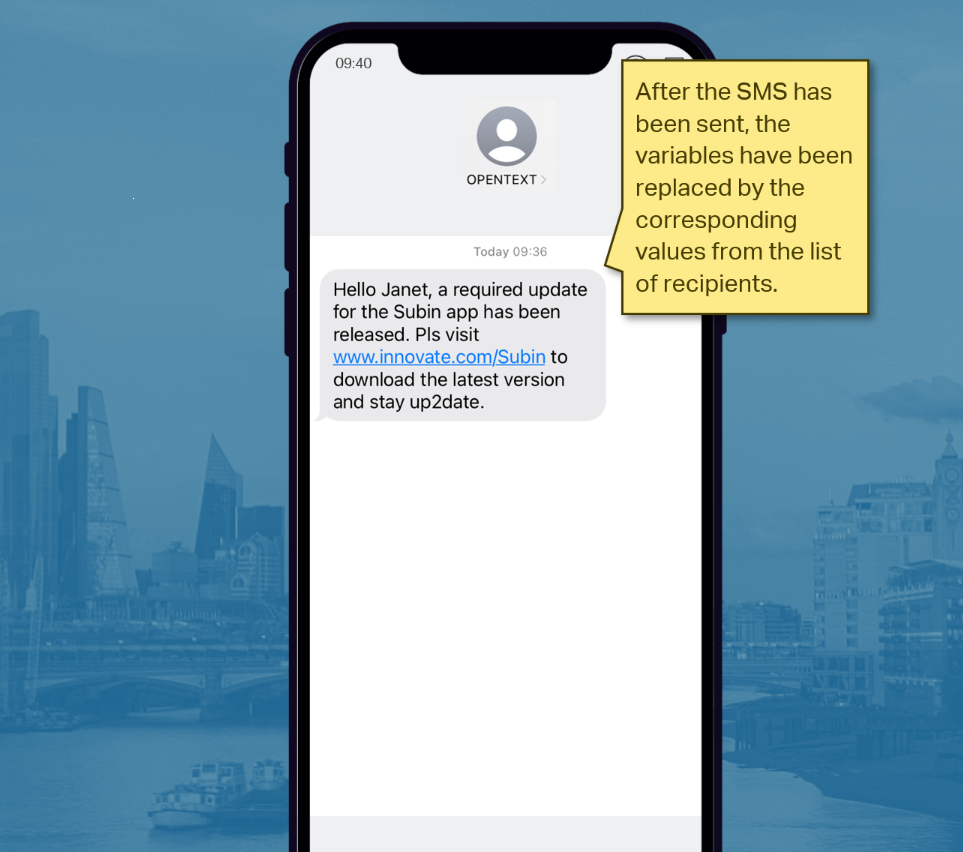
If we want to double-check our message text after we have sent it out, we just need to click on Download icon under Actions section.
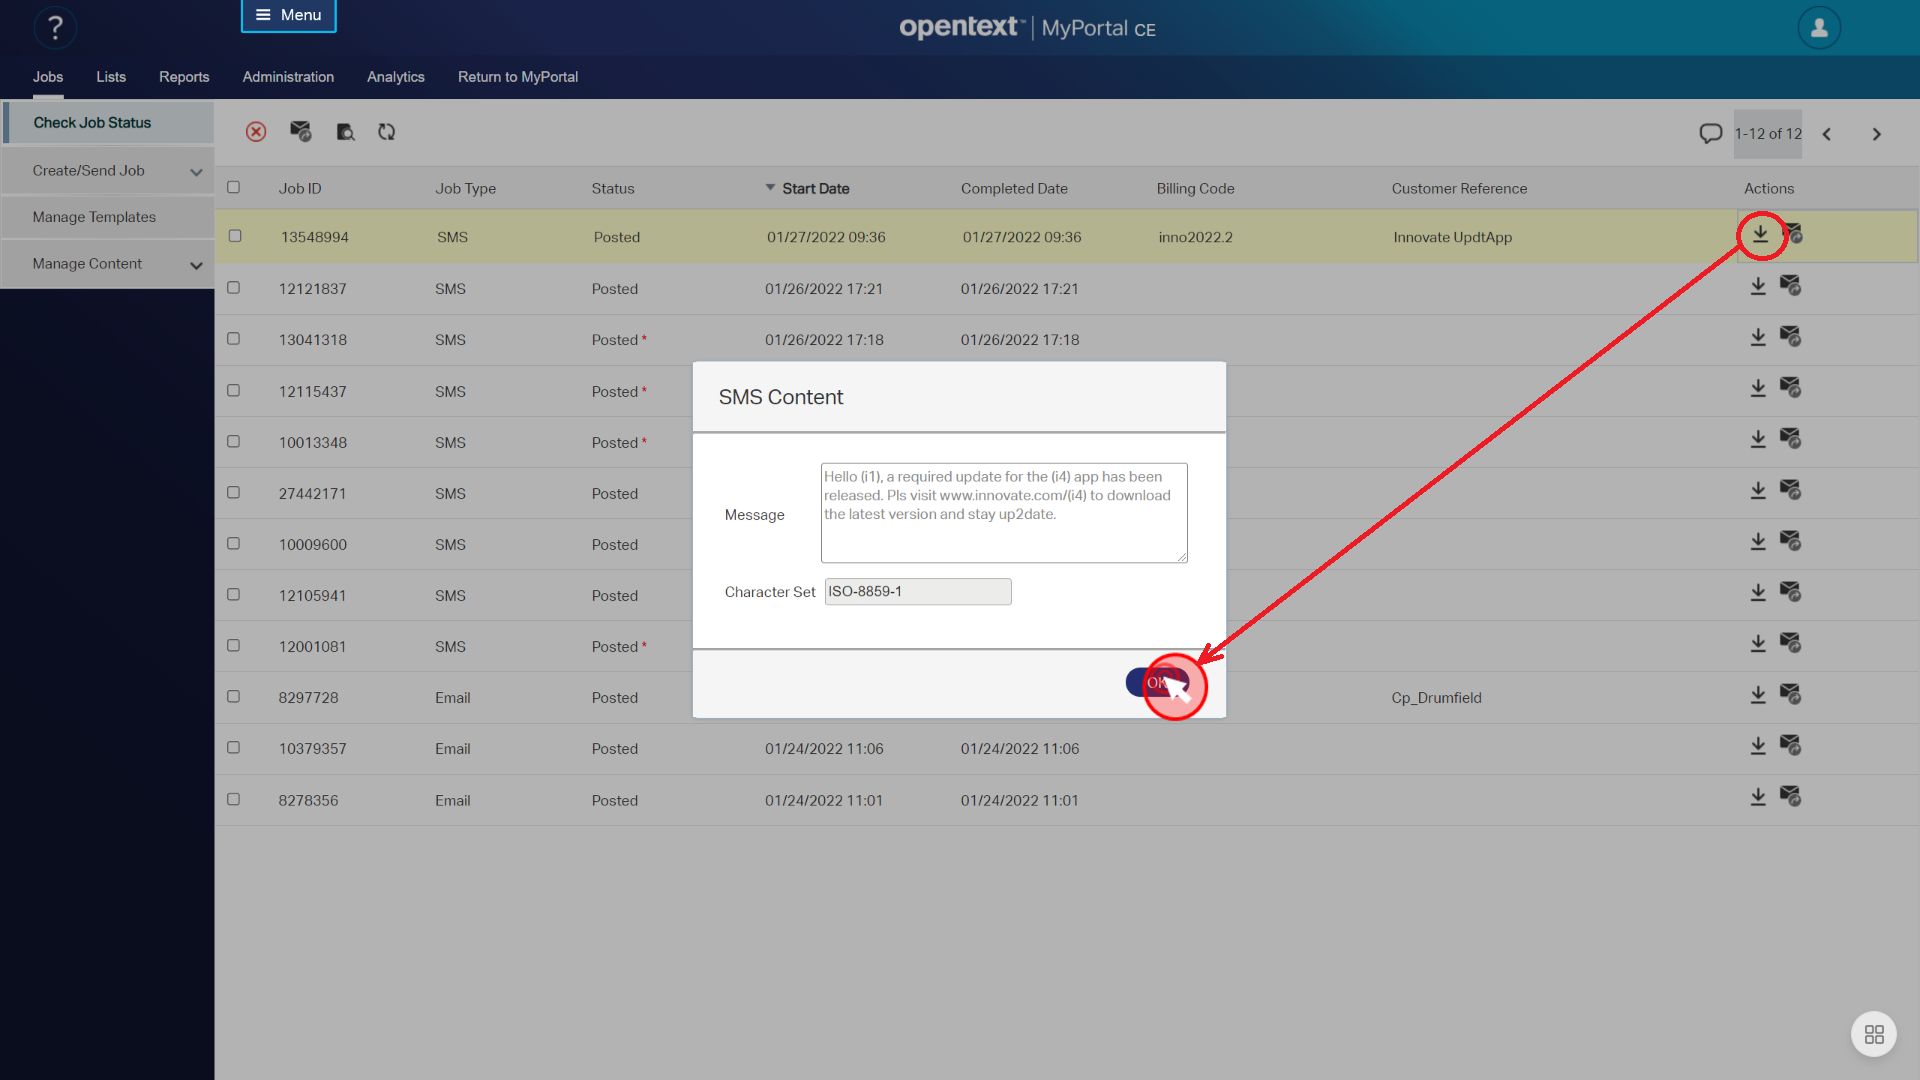
Click on Ok button to close the SMS Content pop-up.
On our mobile phone, we can see the message exactly as it would appear on the devices of our customers.

In addition to checking the status via the frontend, we also get an e-mail that contains the same information. This is important for users who don’t have access to the frontend or just don’t want to use it as they use the API to communicate with OpenText Notifications.